发布:2021/10/13 15:00:10作者:管理员 来源:本站 浏览次数:1557
本演练演示如何在 Xamarin.Android 应用程序中使用本地通知。它演示了创建和发布本地通知的基础知识。当用户单击通知区域中的通知时,它会启动第二个活动。
概述
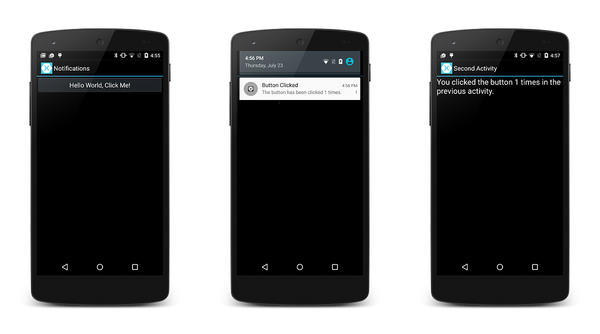
在此演练中,我们将创建一个 Android 应用程序,该应用程序在用户单击活动中的按钮时引发通知。 当用户单击通知时,它会启动第二个活动,该活动显示用户单击第一个活动中的按钮次数。
以下屏幕截图演示了此应用程序的一些示例:
备注
本指南重点介绍 Android 支持库中的 NotificationCompat API。 这些 API 将确保与 Android 4.0 和 API 级别 14 (的最大向后) 。
创建项目
首先,让我们使用 Android 应用模板创建新的 Android 项目。 让我们将此项目称为 LocalNotifications。 (如果不熟悉创建 Xamarin.Android 项目,请参阅 Hello, Android.)
编辑资源文件 值/Strings.xml, 以便它包含两个额外的字符串资源,这些资源将在创建通知通道时使用:
<?xml version="1.0" encoding="utf-8"?> <resources> <string name="Hello">Hello World, Click Me!</string> <string name="ApplicationName">Notifications</string> <string name="channel_name">Local Notifications</string> <string name="channel_description">The count from MainActivity.</string> </resources> 添加 Android.Support.V4 NuGet包
本演练使用 生成 NotificationCompat.Builder 本地通知。 如本地通知中说明,必须在项目中包含Android 支持库 v4 NuGet,以使用 NotificationCompat.Builder 。
接下来,编辑 MainActivity.cs 并添加以下语句,以便 中的类型 using Android.Support.V4.App 可用于我们的代码:
using Android.Support.V4.App;
此外,我们必须向编译器表明我们使用的是 的版本 Android.Support.V4.App TaskStackBuilder ,而不是 Android.App 版本。 添加以下 using 语句以解决任何多义性:
using TaskStackBuilder = Android.Support.V4.App.TaskStackBuilder; 创建通知通道
接下来,向 添加一 MainActivity 个 方法,该方法将根据需要创建 (通道) :
void CreateNotificationChannel() { if (Build.VERSION.SdkInt < BuildVersionCodes.O)
    { // Notification channels are new in API 26 (and not a part of the // support library). There is no need to create a notification // channel on older versions of Android. return;
    } var name = Resources.GetString(Resource.String.channel_name); var description = GetString(Resource.String.channel_description); var channel = new NotificationChannel(CHANNEL_ID, name, NotificationImportance.Default)
                  {
                      Description = description
                  }; var notificationManager = (NotificationManager) GetSystemService(NotificationService);
    notificationManager.CreateNotificationChannel(channel);
}
更新 OnCreate 方法以调用此新方法:
protected override void OnCreate(Bundle bundle) { base.OnCreate(bundle);
    SetContentView(Resource.Layout.Main);

    CreateNotificationChannel();
}
定义通知 ID
我们需要通知和通知通道的唯一 ID。 让我们编辑 MainActivity.cs, 将以下静态实例变量添加到 MainActivity 类:
static readonly int NOTIFICATION_ID = 1000; static readonly string CHANNEL_ID = "location_notification"; internal static readonly string COUNT_KEY = "count"; 添加代码以生成通知
接下来,我们需要为按钮事件创建新的事件 Click 处理程序。 将以下方法添加到 MainActivity:
void ButtonOnClick(object sender, EventArgs eventArgs) { // Pass the current button press count value to the next activity: var valuesForActivity = new Bundle();
    valuesForActivity.PutInt(COUNT_KEY, count); // When the user clicks the notification, SecondActivity will start up. var resultIntent = new Intent(this, typeof(SecondActivity)); // Pass some values to SecondActivity: resultIntent.PutExtras(valuesForActivity); // Construct a back stack for cross-task navigation: var stackBuilder = TaskStackBuilder.Create(this);
    stackBuilder.AddParentStack(Class.FromType(typeof(SecondActivity)));
    stackBuilder.AddNextIntent(resultIntent); // Create the PendingIntent with the back stack: var resultPendingIntent = stackBuilder.GetPendingIntent(0, (int) PendingIntentFlags.UpdateCurrent); // Build the notification: var builder = new NotificationCompat.Builder(this, CHANNEL_ID)
                  .SetAutoCancel(true) // Dismiss the notification from the notification area when the user clicks on it .SetContentIntent(resultPendingIntent) // Start up this activity when the user clicks the intent. .SetContentTitle("Button Clicked") // Set the title .SetNumber(count) // Display the count in the Content Info .SetSmallIcon(Resource.Drawable.ic_stat_button_click) // This is the icon to display .SetContentText($"The button has been clicked {count} times."); // the message to display. // Finally, publish the notification: var notificationManager = NotificationManagerCompat.From(this);
    notificationManager.Notify(NOTIFICATION_ID, builder.Build()); // Increment the button press count: count++;
}
MainActivity 的 方法必须调用 来创建通知通道,并将 方法分配给按钮的 事件 (替换模板提供的委托事件 OnCreate ButtonOnClick Click) :
protected override void OnCreate(Bundle bundle) { base.OnCreate(bundle);
    SetContentView(Resource.Layout.Main);

    CreateNotificationChannel(); // Display the "Hello World, Click Me!" button and register its event handler: var button = FindViewById<Button>(Resource.Id.MyButton);
    button.Click += ButtonOnClick;
}
创建第二个活动
现在,我们需要创建另一个活动,当用户单击我们的通知时,Android 会显示该活动。 将另一个 Android 活动添加到名为 SecondActivity 的项目。 打开 SecondActivity.cs 并将其内容替换为此代码:
using System; using Android.App; using Android.OS; using Android.Widget; namespace LocalNotifications {
    [Activity(Label = "Second Activity")] public class SecondActivity : Activity { protected override void OnCreate(Bundle bundle) { base.OnCreate(bundle); // Get the count value passed to us from MainActivity: var count = Intent.Extras.GetInt(MainActivity.COUNT_KEY, -1); // No count was passed? Then just return. if (count <= 0)
            { return;
            } // Display the count sent from the first activity: SetContentView(Resource.Layout.Second); var txtView = FindViewById<TextView>(Resource.Id.textView1);
            txtView.Text = $"You clicked the button {count} times in the previous activity.";
        }
    }
}
还必须为 SecondActivity 创建资源布局。 将新的 Android 布局 文件添加到名为 Second.axml 的项目。 编辑 Second.axml 并粘贴以下布局代码:
<?xml version="1.0" encoding="utf-8"?> <LinearLayout xmlns:android="http://schemas.android.com/apk/res/android" android:orientation="vertical" android:layout_width="fill_parent" android:layout_height="fill_parent" android:minWidth="25px" android:minHeight="25px"> <TextView android:text="" android:textAppearance="?android:attr/textAppearanceLarge" android:layout_width="fill_parent" android:layout_height="wrap_content" android:id="@+id/textView1" /> </LinearLayout> 添加通知图标
最后,添加一个小图标,该图标将在通知启动时显示在通知区域中。 可以将此 图标复制到 项目,也可以创建自己的自定义图标。 将图标文件 ic _ stat _ 按钮 _click.png, 并复制到 Resources/drawable 文件夹。 请记得使用 ">现有项..." 将此图标文件包括在项目中。
运行应用程序
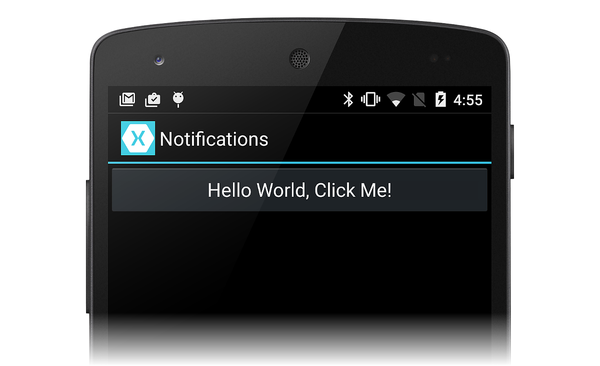
生成并运行应用程序。 应显示第一个活动,类似于以下屏幕截图:
单击该按钮时,应注意到通知的小图标显示在通知区域中:
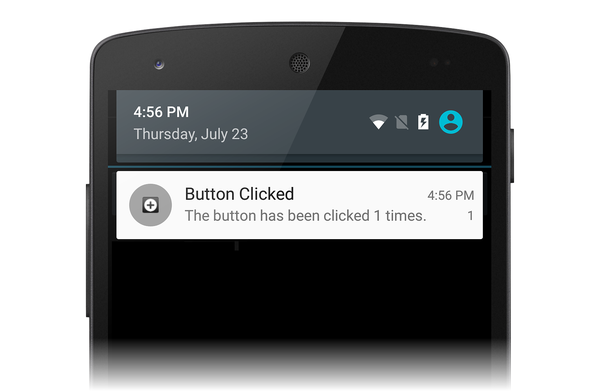
如果向下轻扫并公开通知抽屉,应会看到通知:
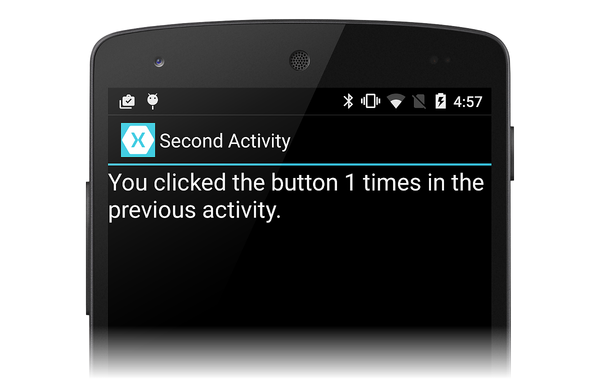
单击通知时,它应会消失,并且应启动其他活动,看起来 – 与以下屏幕截图类似:
恭喜! 此时已完成 Android 本地通知演练,并且有一个可以参考的工作示例。 通知比此处显示的信息要多,因此,如果需要更多信息,请参阅 Google 关于通知 的文档。
总结
本演练用于创建 NotificationCompat.Builder 和显示通知。 它演示了如何启动第二个活动作为响应用户与通知交互的方法的基本示例,并演示了将数据从第一个活动转移到第二个活动。
相关链接
- LocalNotifications (示例)
- Android Oreo 通知通道
- 通知
- NotificationManager
- NotificationCompat.Builder
- PendingIntent


